
ARE AVAILABLE HERE....
For other methods (not nearly as awesome) Look below.
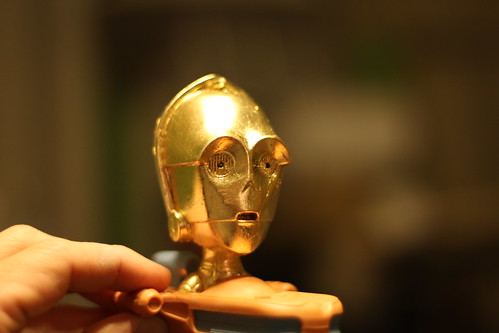
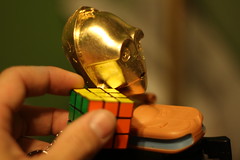
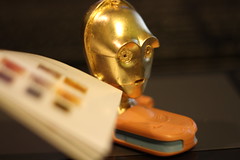
After
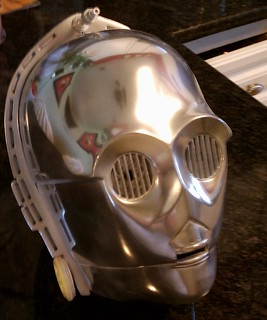
Before
As I mentioned in my last post, I've been on the lookout for a good alternatives for adding gold to the consumable parts like hands and feet, along with any other parts that may get more abuse than the rest of the suit, (which will be either vac-metallized or spray chromed to achieve the gold effect).
Without getting into some very expensive metallic spray paints (upwards of $50 per can) the choices are somewhat limited but I decided to test out all the readily available brands of metallic spray paints to see if one might be passable. In order from worst to best, here's what I discovered...
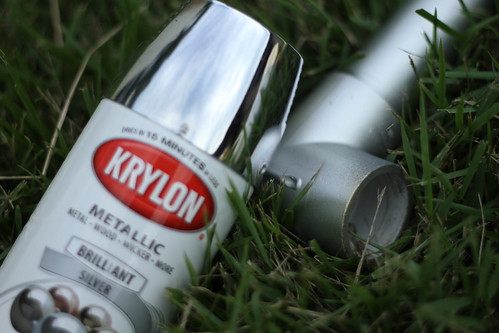
Krylon Metallic "Brilliant Silver"
Total lie.. this stuff looks like crap. Plus it stayed sticky and didn't spray a very smooth finish.
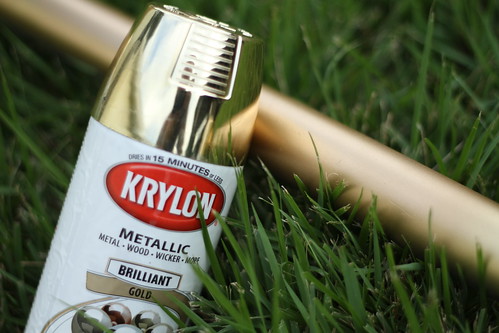
Krylon Metallic "Brilliant Gold"
Eh.. Slightly better than the quality of the silver but still pretty terrible. Looks nothing like the cap, the color is more brass/copper than gold.
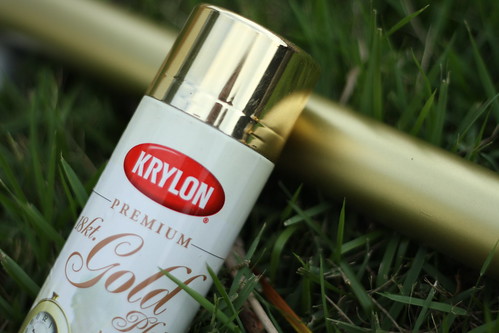
Krylon Premium "18kt Gold Plus"
Color wise, it's the closest match to the cap out of the Krylons I tested but it's still not chrome looking at all. doesn't even remotely pass as metal. The color is almost identical to the Rustolium paint I tested but still doen't spray as nice and at about a dollar more for a smaller can don't even bother.
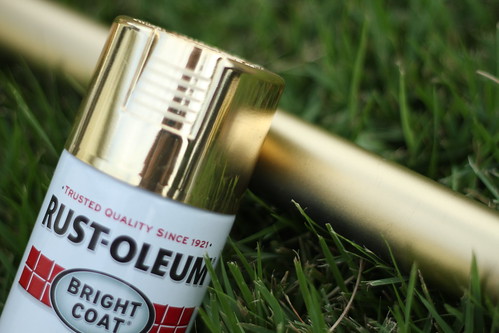
Rust-Oleum Bright Coat"Gold"
The actual color of both of the Rust-Oleum golds is pretty good but still not really too metal looking BUT much better than the Krylon alternatives. This is what I used to paint the foot in my last post. Catches light decently enough...
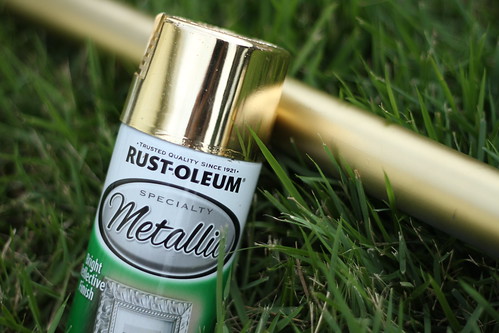
Rust-Oleum Specialty Metallic "Gold"
Looks ALMOST identical to the other gold Rust-Oleum. It seemed like the finish was slightly more smooth and the had mildly sharper reflections but overall not different enough to matter.
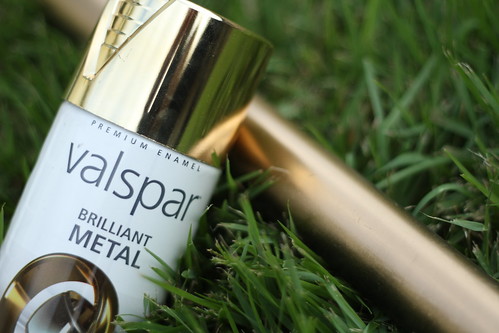
Valspar Brilliant Metal "Gold"
As far as looking like actual metal, the Valspar was MUCH better than the others. You can see actual sharp reflections in the paint, much like real metal. This would have been my top choice with the HUGE exception that the color is totally wrong! It looked much more like a polished copper than gold. Which is a shame considering how great the finish looks.
As a note about the paints. Obviously the top of the can lies for all of these but whatever they used to paint the actual caps on all of these looks identical. I would like to find out who did that for them.
(UPDATE!)
Ok, one more paint to add to the list. This one gave me surprisingly good results in my Iron Man 2 "War Machine" build.
Krylon Metallic "Matte Aluminum"
This paint, despite being called "matte" is FAR more reflective than any of the other Krylon metallics I tested. In areas that were properly sanded the reflections are pretty amazing. Not sure if I could put this to use on Threepio (maybe silver leg touch-ups) but it makes me curious to see how the matte gold looks...
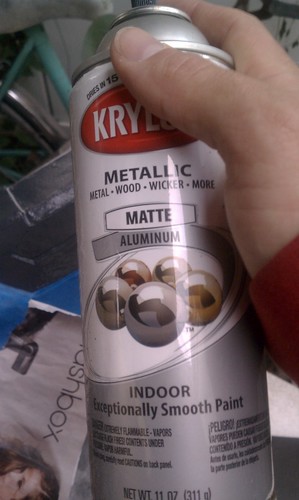
This is a quick pass on my War Machine faceplate, which is terribly sanded. the few areas that are very smooth show clear reflections of things across the room. In the end, I actually had to add some weathering/dirt to this to make it less reflective.
SO, with all of this spray paint being a bust I decided to look into other cheap DIY methods...
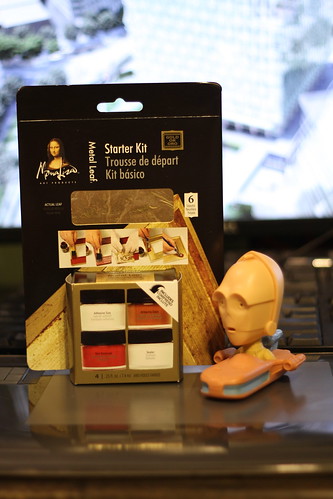
The next, and best alternative I found was gilding, or gold leafing. It's very easy to do, relatively cheap and I'm super impressed with the results. (see top of this post)
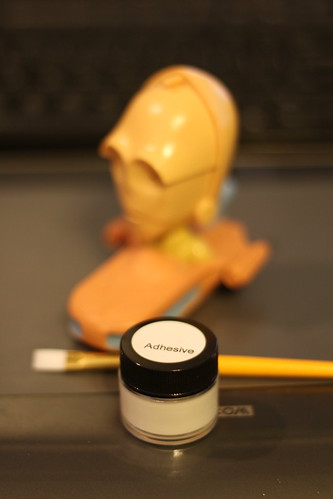
For about $10 I picked up the starter kit from Micheal's craft store. It comes with adhesive, some other crap I won't use and 6 imitation 23 karat gold sheets (made from zinc and copper alloy), which requires a finishing varnish to protect against tarnishing. Actual gold leaf isn't terribly priced and doesn't need to be varnished once it's done..
The application is pretty easy.
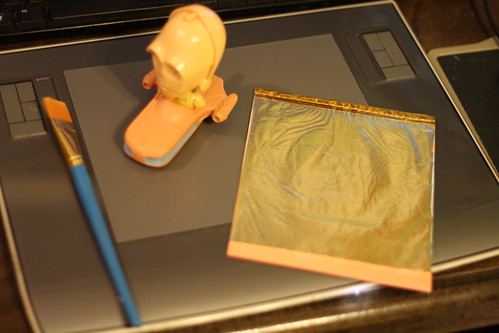
Basically, brush on the adhesive, called "size". Let it dry for 20-40 minutes. It smells almost exactly like Elmer's white glue but dries very tacky. Once dry the gold foil (which is EXTREMELY thin) will adhere to it very very very easily.
There are loads of tutorials about this on youtube.
This one has a few really good tips around 3:59 through 5:16
Here are my initial results. I was actually able to get the finish more shiny/reflective and remove some of the fine imperfections and excess gold flakes after theses photos were taken. It was looking really good but I went overboard and ended up messing up the finish a few minutes later. Probably would have been good for me to allow the size to cure for a full day before i started removing the dangling flakes. I know better for next time...
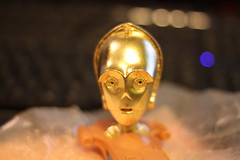
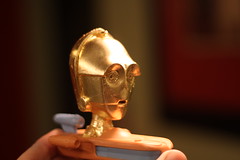
A few examples of the reflective qualities which are more than good enough for hands and feet in my opinion.
I'm about 99% sure this is the method I'll be using. If I find something new and/or better I'll be sure to share!


Hi mate, really enjoying your 3PO tutorial. Just wondering if you think you could do a whole TK409 3PO suit with this gold-leaf?
ReplyDeleteKrylon Metallic "Matte Aluminum"
ReplyDelete.... makes me curious to see how the matte gold looks...
Did you ever get a chance to check out the gold? I'm looking for a nice shinny gold paint.
The gold looks pretty terrible. The best metallic look I've found so far is Alclad chrome tinted to make a gold finish. Looks WAY better than any of the spray paint options.
Delete